Datasource Using MongoDB
• This document is all about how to create Datasource using MongoDB & make a dataset out of it in OPNBI. Use Case: Datasource using Mongo DB & make dataset using that datasource
- Log in to the OPNBI application using your credentials.
- Click on the hamburger menu Master Data Datasource, screen will look as per the image below:
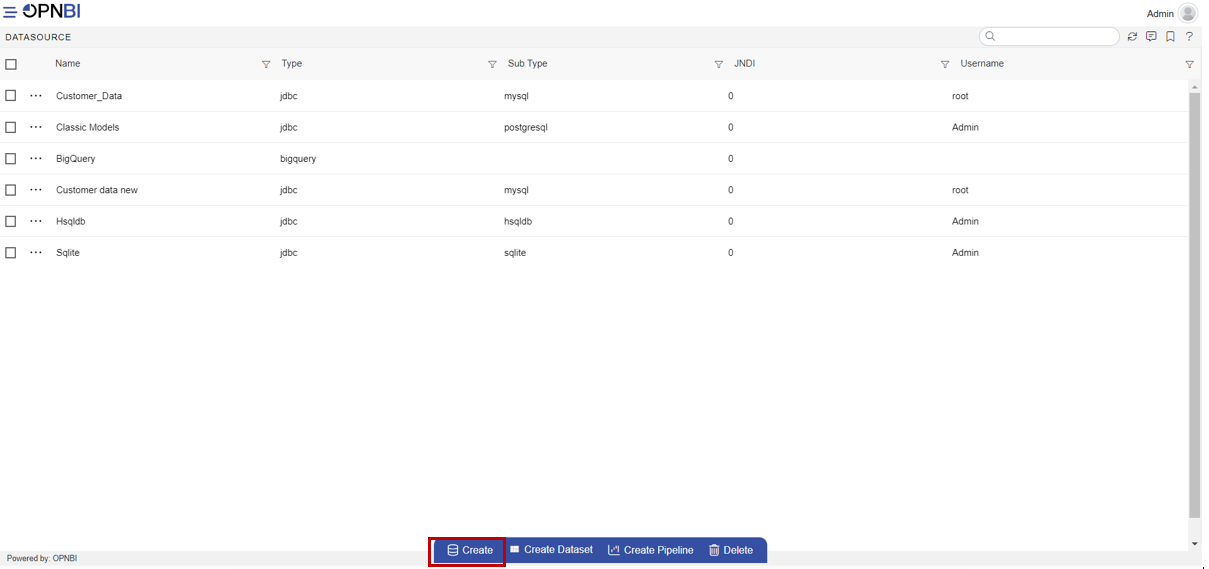
- Click on Create Datasource button from the footer menu as shown in the above image.
- Database Connection window will open & it will look as per below:
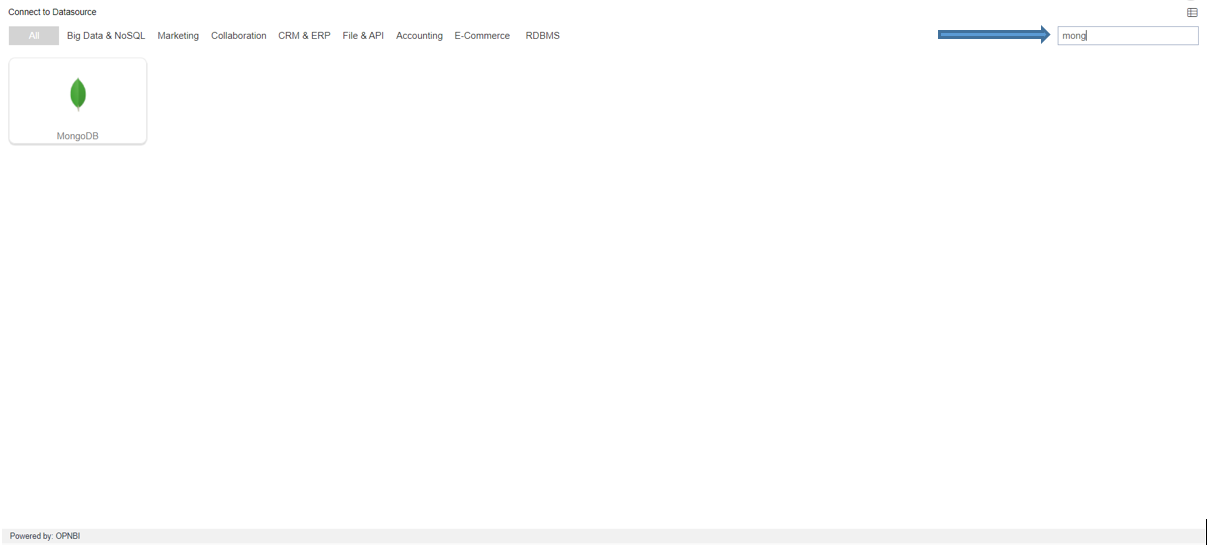
- Enter the details as per below: • Select NoSQL MongoDB • Display Name: admin_OPNBI • In Connection Url write as below:
<servername>: 127.0.0.1<port>:27017<databaseName>: admin
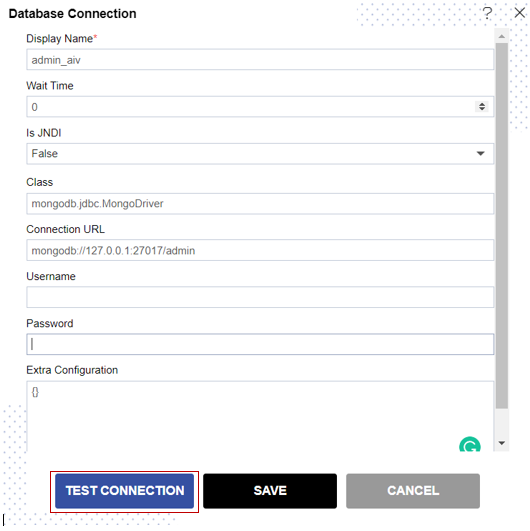
- Clicks on the Test Connection button & one pop-up will appear in which Connection Successfully is written.
- When the user clicks on the Save button another pop-up will appear asking you for permission to create a dataset as shown below:
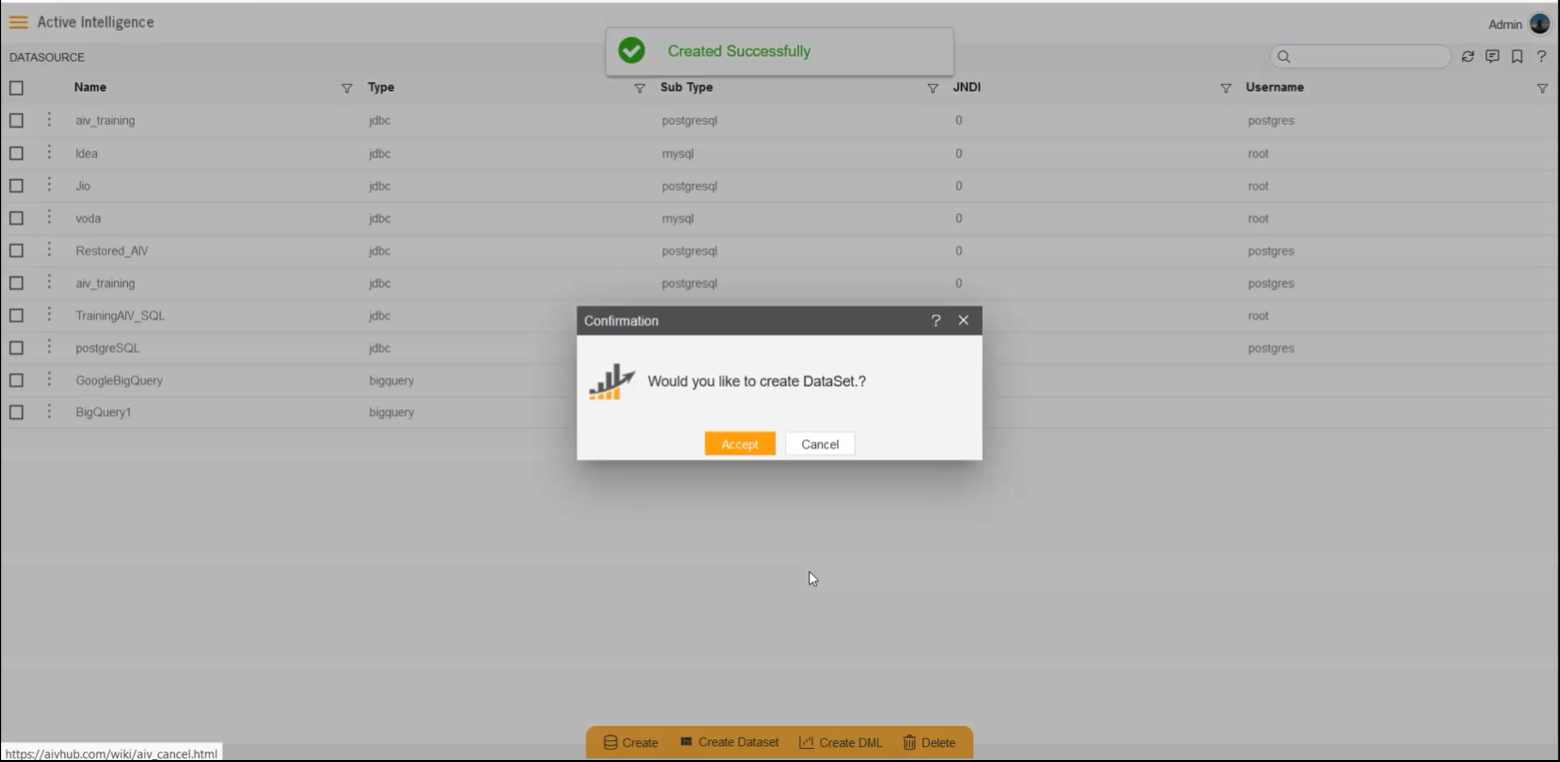
- Click on Accept button & Create Dataset window will appear as shown in the image below:
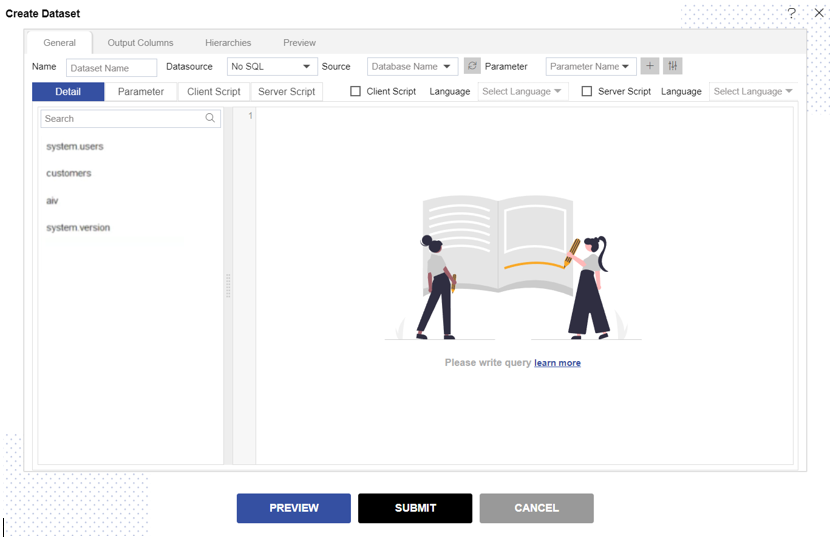
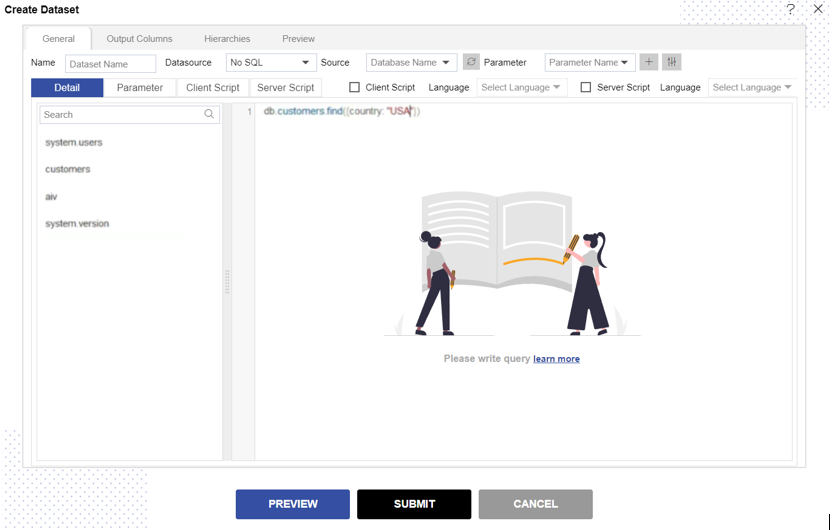
- In the Query box write code as given below: db.customers.find({country: “USA”})
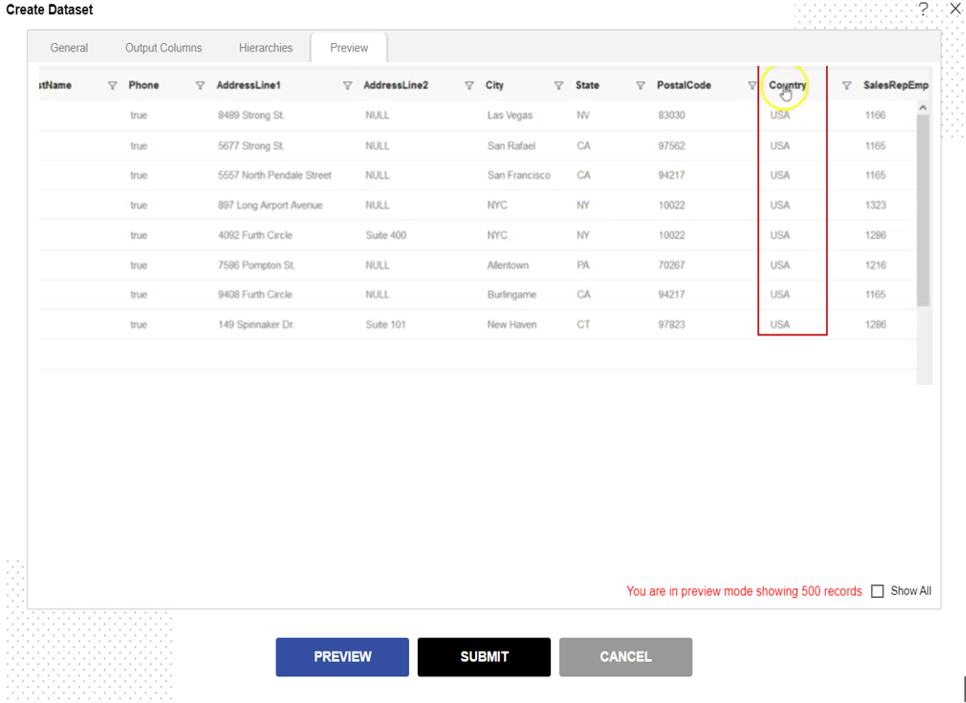
- Go to Preview mode & see the country column. It will show the data of the USA as user written in Query.
- Go to the General mode & give a name to the dataset “Customers_USA” & click on Submit button.
- Created Successfully message will pop up at the top of the screen.
- Go to the hamburger menu Master Data Dataset
- When the user clicks multiple times on the Last Updated column, created dataset ‘Customers_USA’ will appear at the top as shown below:

- User needs to double click on that dataset if they want to edit that created dataset ‘Customers_USA”.